Are you tired of your worn-out zero gravity chair ruining your relaxation time? This article dives deep into the COITEK Zero Gravity Chair Replacement Fabric and Repair Cord Kit, an excellent solution for restoring your outdoor lounge chair. We’ll explore its features, advantages, and how it can extend the life of your beloved patio accessory.
Product Features
| Feature | Details |
|---|---|
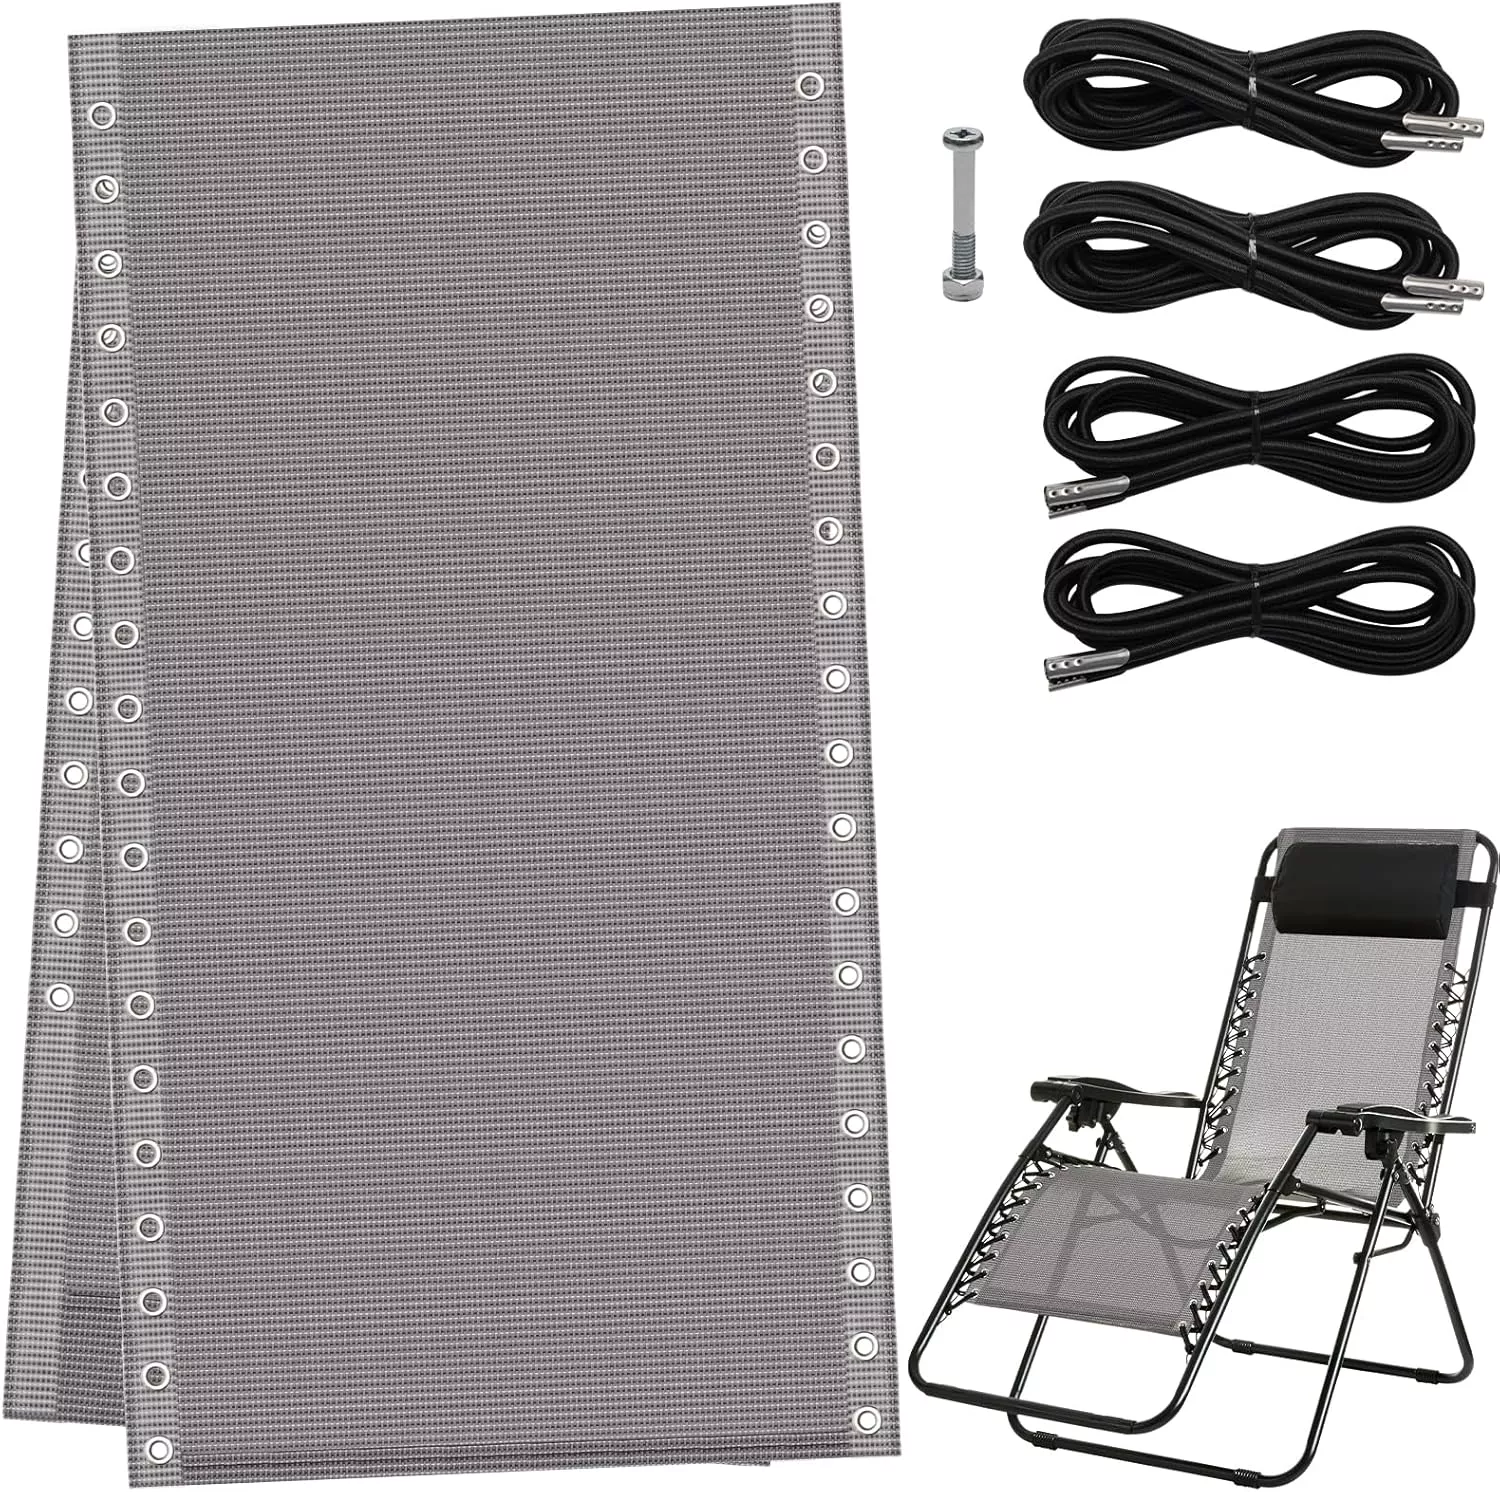
| Material | Made of heavy-duty density textilene fabric; waterproof, wear-resistant, and fade-resistant. |
| Compatibility | Fits most chairs like sun loungers, lounge chairs, recliners, folding chairs, anti-gravity chairs, and bungee chairs. |
| Elastic Cords | Includes 4 replacement elastic cords; short 59 inches and long 86.5 inches in length. |
| Maintenance | Easy to clean; simply wipe with a cloth. |
| Package Contents | 1 PCS replacement fabric; 4 PCS replacement cords (2 long + 2 short). |
| Installation | Easy to install, perfect for a DIY project. |
Product Overview
| Pros | Cons |
|---|---|
| Durable and weather-resistant material. | Installation may require some effort for tight fits. |
| Compatible with various chair models. | Limited color options available. |
| Cost-effective solution to extend chair life. | Cords may require adjustment for optimal tension. |
Understanding the Importance of Chair Maintenance
When it comes to revamping your zero gravity chair, understanding how to install the COITEK replacement fabric and cords is critical. Let me tell you, this process can be straightforward if you take it step by step. First, gather your tools: you’ll need a flat surface, scissors, and a screwdriver. I always find it helpful to lay everything out before starting to ensure I have what I need within reach.
Now, the initial step involves removing the old fabric and cords. This requires a bit of patience, as the fasteners might be tightly secured. Remember to keep track of how everything is attuned; taking a few pictures can be beneficial for reference later. Once the old fabric is off, you should clean the frame thoroughly, as this ensures there’s no dirt or debris that could interfere with the installation of your new fabric.
Next, installing the new fabric is a breeze. Begin by sliding the replacement fabric over the frame, ensuring it fits snugly into the grooves. Use the provided cords to secure the fabric tightly; this part is crucial as it greatly affects comfort. I’ve learned that it’s actually helpful to test the tension of the fabric before fully tightening the cords. Ensuring a snug fit will maximize your relaxation experience, avoiding any future sagging or discomfort.
Finally, after everything is secured, take a moment to inspect your work. Make sure there are no loose ends, and the adjustments feel even. Trust me, a little extra care during installation can prolong the life of your chair, allowing you to enjoy countless hours of outdoor relaxation.
How to Successfully Install Your Replacement Fabric and Cords
Installing the replacement fabric and cords on your zero gravity chair may seem daunting, but I assure you it can be a straightforward task. First, gather your materials: the COITEK replacement fabric and cords, a pair of scissors, and a screwdriver. Before you start, it’s essential to choose a well-lit and spacious area to work in, as this will help you see the details more clearly and maneuver comfortably.
Begin by laying your chair on a flat surface, ensuring it is entirely disassembled. This will give you easy access to the frame. As you remove the old fabric, take note of how it connects to the frame; this will serve as your guide when attaching the new fabric. If you encounter stubborn knots or tight areas, be patient—carefully cutting cords may be necessary, but ensure you leave enough to tie new ones securely.
When you’re ready to attach the replacement fabric, start from one end and work your way across. Gently pull the fabric to create a snug fit, as loose fabric can lead to discomfort later on. As I thread the cords through the designated slots, I recommend using a pair of pliers to help tighten them—this ensures they stay in place for longer. Remember to double-check that everything is properly aligned; any misalignment may affect the chair’s function.
With these tips in mind, you’re on your way to making your zero gravity chair feel brand new. A smooth installation not only enhances comfort but also extends its longevity—so take your time, and enjoy the process!
Conclusions
In summary, the COITEK Zero Gravity Chair Replacement Fabric and Repair Cord Kit is a fantastic investment for anyone looking to revive their outdoor seating. Its durable materials and easy installation make it a preferred choice for DIY enthusiasts. With this kit, you can continue to enjoy relaxing moments in your revitalized chair for many seasons to come.